KVM VMs & Networking Quickstart

KVM VMs & Networking Quickstart
Why?

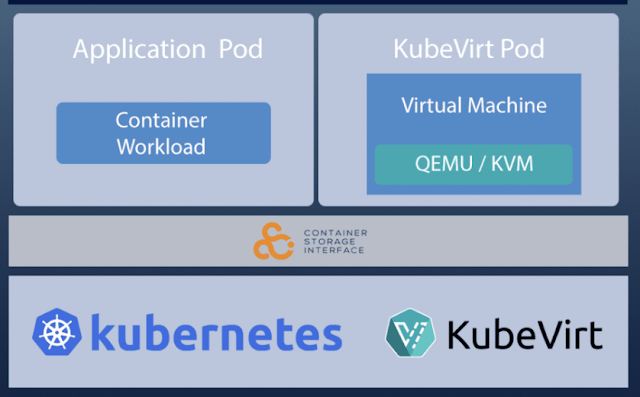
Well, the Broadcom acquisition of VMware, and subsequent packaging and pricing changes, have caused customers to look for options. To be the most help to my customers, I have been getting my hands on as many "VMware Alternatives" as possible - Nutanix, Proxmox, OpenShift Virtualization, Harvester, KVM. OpenShift Virtualization and Harvester are complete solutions supported by major companies (RedHat/IBM & SUSE). They are also very complex as the virtualization sits on top of a full Kubernetes stack. Kubernetes is fantastic at scaling and availability of container workloads, but if all you need is a VM, you may not also need Kubernetes. Linux > Lots of Default K8S Pods > KubeVirt Pods > QEMU Pod > VM. With vSphere, the stack is ESXi > VM.
What?
Installing KVM (kernel-based virtual machines) is pretty simple. All you need is a Linux distribution. And a keyboard.
How?
(Most of these instructions are from this excellent post)
Determining if your Linux Machine can run KVM
- egrep -c '(vmx|svm)' /proc/cpuinfo
- (Check for virtualization in cpu flags. If you don't get a number > 0, check your BIOS for the Intel VT or AMD-V setting.)
- kvm-ok
- (Check to see if kvm is already enabled. If you don't have this command installed run "sudo apt install cpu-checker")
- INFO: /dev/kvm exists
- KVM acceleration can be used
Install the KVM packages in Linux (I use Debian/Ubuntu)
- sudo apt install -y qemu-kvm virt-manager libvirt-daemon-system virtinst libvirt-clients bridge-utils
- (virt-manager is actually a management tool, but very handy)
Start the KVM Service libvirtd
- sudo systemctl enable libvirtd
- sudo systemctl start libvirtd
- sudo systemctl status libvirtd
Make Yourself a KVM User & Reboot
- sudo usermod -aG kvm $USER
- sudo usermod -aG libvirt $USER
- sudo reboot
Create a VM with NAT Networking - GUI Mode
The virt-manager GUI is lovely for creating, starting, and interacting with VMs and NAT networks. One drawback, you cannot create bridge networks with the virt-manager GUI. Here is how to create a simple NAT network and a simple Linux VM:
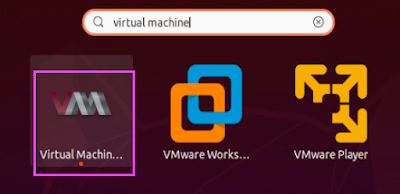
- Start virt-manager GUI with your favorite Linux launcher
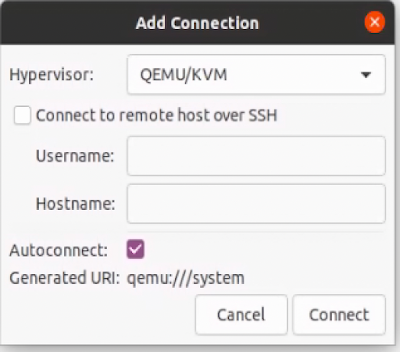
- Choose "Add Connection" from the File menu and connect to your local KVM instance.
- Choose "Connection Details" from the Edit menu and choose the Virtual Networks tab. (You will see my existing NAT network in this screenshot)
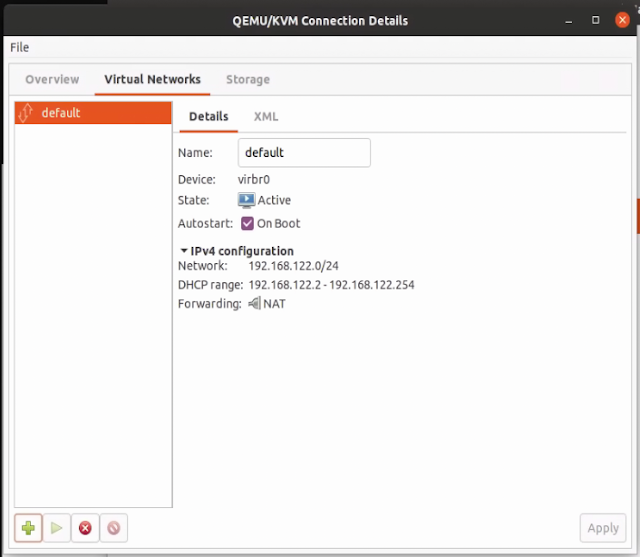
- Click the + icon
- Give your virtual network a name
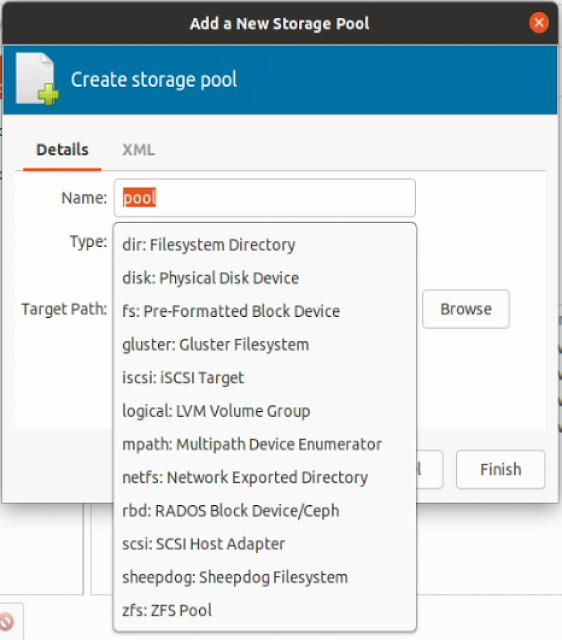
- Choose the virtual network type from the drop down. You will notice that "bridge" is not an option. We will cover that later. Choose NAT for now.

- Choose your physical NIC and accept the suggested NAT address range or choose a new range that is different from and existing subnets.
- Click Finish
- Add more storage locations if needed in the Storage tab. virt-manager already knows about the default virtual machine location - /var/lib/libvirt/images. If you need your VMs to have access to other locations for disks or ISOs, add them here. You have many options for storage locations.
- OK, let's create a Linux VM on the NAT virtual network
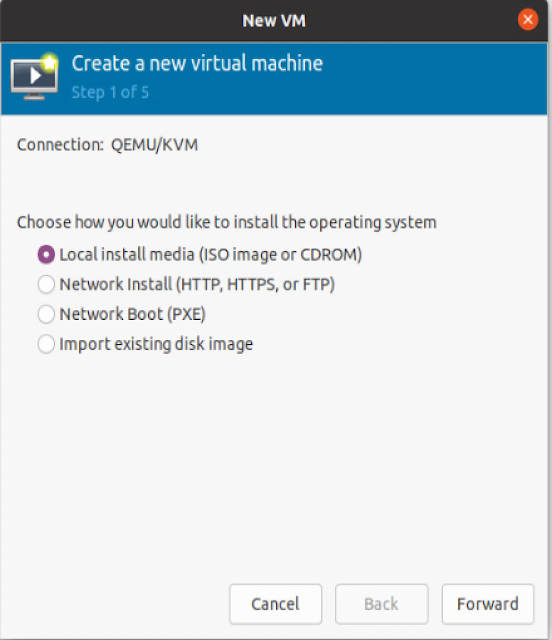
- Choose "New Virtual Machine" from the File menu
- Choose your installation source. We will use an ISO.
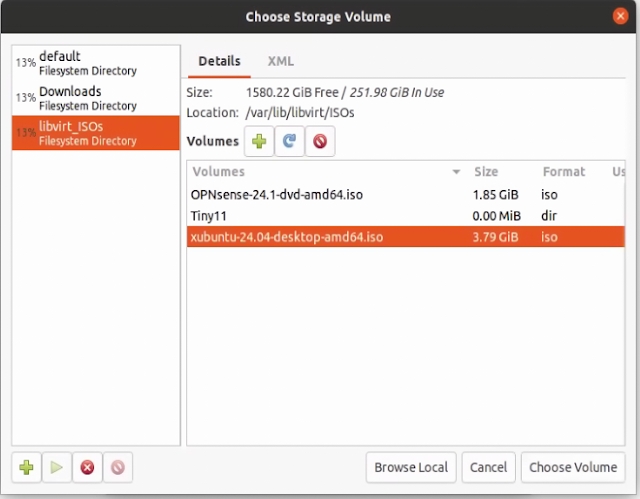
- Click Forward and then Browse to choose your installation ISO
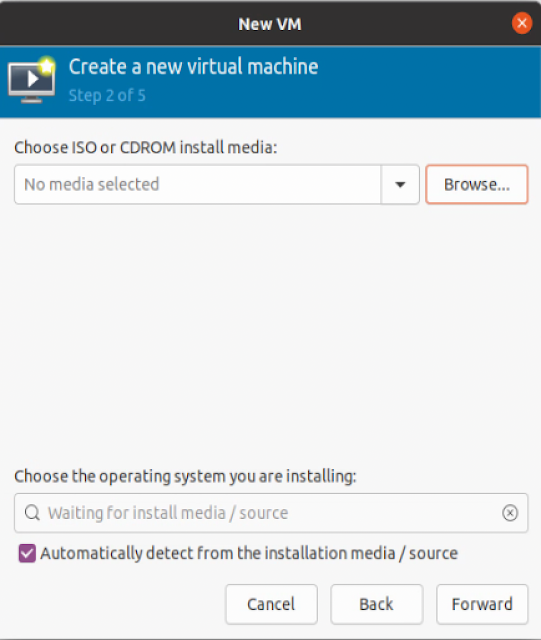
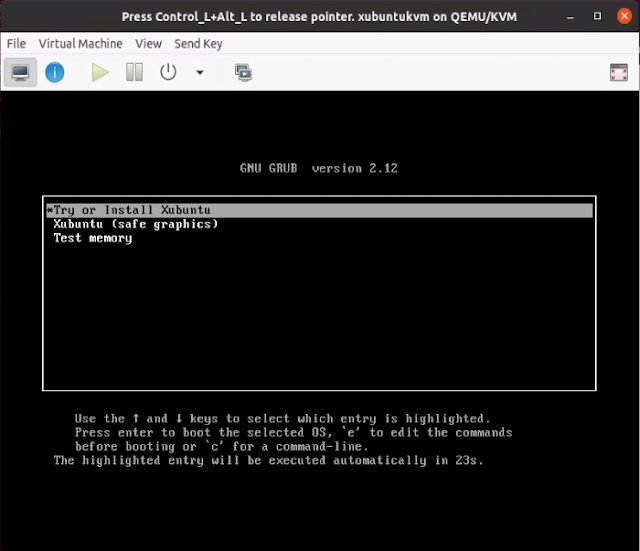
- I'll choose the Xubuntu ISO that I had downloaded previously (One of my top 2 favorite distros. I'm a sucker for XFCE.)
- Select an OS if one is not selected automagically for you.
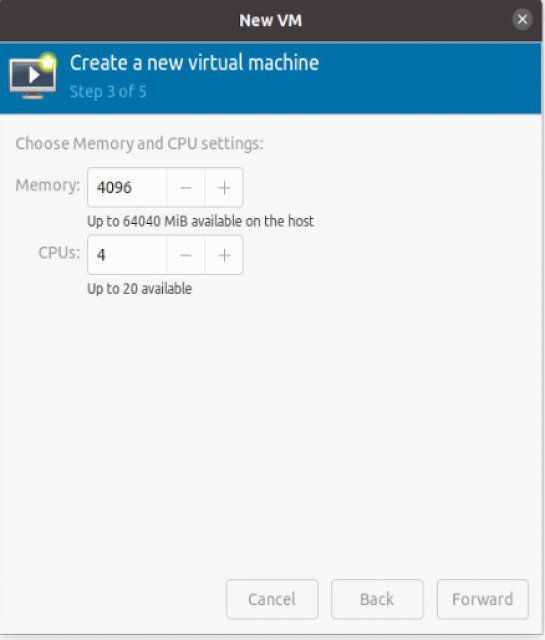
- Click Forward and choose your RAM and CPU
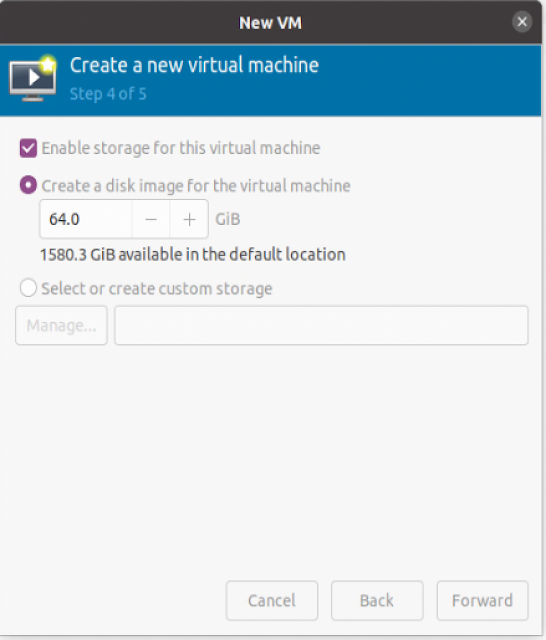
- Click forward and size your boot disk
- Click Forward, name your VM, choose your network. I chose the NAT network we just created.
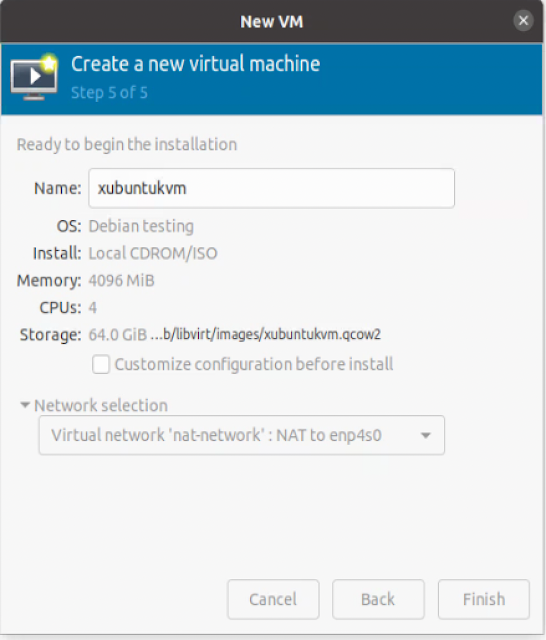
- Click Finish
- You will then be presented with a console where you can step through your OS installation.
-
- Once your VM is up, check the network and your VM should be in the NAT IP range we created.
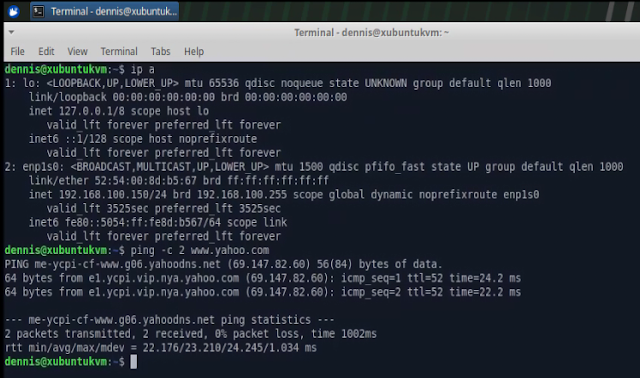
- The VM can access the outside world but cannot act as a server to the outside world as it is on a NAT network, not a Bridge network. We'll fix that next.
Create a Bridge Network - Text Mode
- You need to create a bridge virtual network if you want your KVM VMs to be on the same subnet as the rest of your LAN. This is especially important for any VMs that will act as servers. As usual, I found many methods of creating a bridge network that either didn't work or took my host offline. Then I found two methods that worked. This method seems to be the most reliable and easiest. Since I did not want to mess with the NIC running all sorts of servers on my host, I added a second NIC through a USB dongle to create a bridge network on. Once connected, that NIC presented itself as enx00e04c6801fa.
- To create a bridge network on this NIC, I needed to create one netplan file and then apply that file. This file will be activated on boot in the future.
- $ sudo vi /etc/netplan/02-kvmbr0.yaml
network:
  version: 2
  renderer: networkd

  ethernets:
    enx00e04c6801fa:
      dhcp4: false
      dhcp6: false

  bridges:
    br0:
      interfaces: [enx00e04c6801fa]
      addresses: [192.168.1.12/24]
      # gateway4 is deprecated, use routes instead
      routes:
      - to: default
        via: 192.168.1.3
        metric: 100
        on-link: true
      mtu: 1500
      nameservers:
        addresses: [192.168.1.3]
      parameters:
        stp: true
        forward-delay: 4
      dhcp4: no
dhcp6: no- Change the enx* items to match your NIC device name, an unused IP address on your subnet, your router IP, and your Name Server IP.
- Once edited run
- $ sudo netplan apply
- "ip a" will show the newly created bridge connected to the USB NIC and sharing a MAC address
- 3: enx00e04c6801fa: <BROADCAST,MULTICAST,UP,LOWER_UP> mtu 1500 qdisc fq_codel master kvmbr0 state UP group default qlen 1000
- link/ether 00:e0:4c:68:01:fa brd ff:ff:ff:ff:ff:ff
- 4: kvmbr0: <BROADCAST,MULTICAST,UP,LOWER_UP> mtu 1500 qdisc noqueue state UP group default qlen 1000
- link/ether 00:e0:4c:68:01:fa brd ff:ff:ff:ff:ff:ff
- inet 192.168.1.31/24 brd 192.168.1.255 scope global noprefixroute kvmbr0
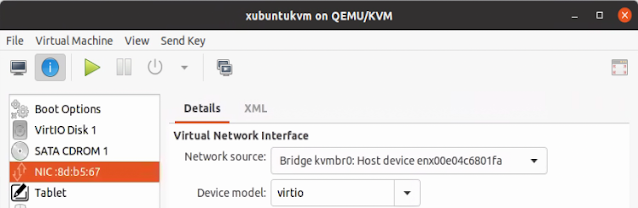
- Now if we shutdown our xubuntukvm and change the NIC to be on bridge kvmbr0, the VM should get an IP address on our normal subnet of 192.168.1.0
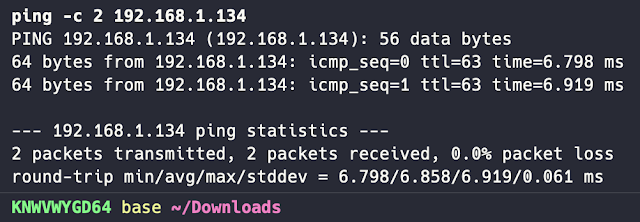
- From my Mac laptop (on my 10.0.0.0 Wi-Fi subnet), I can ping the xubuntu VM on the bridge network. Perfect.
Remote Management Tools
It's nice to have remote management tools for your virtual machines. Here are a few that work well with KVM:
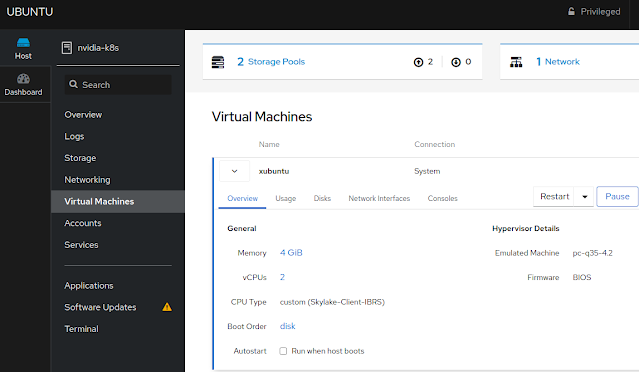
Web-Based - Cockpit
Cockpit is a great web-based Linux management suite of tools. The base cockpit manages Linux servers but has many plug-ins. cockpit-machines is the plug-in for virtual machines. To install:
- sudo apt install cockpit
- sudo apt install cockpit-machines
The web GUI can be found at https://fqdn:9090/machinesFrom here, you can manage and create VMs, networks, and storage
CLI-Based
KVM comes with a built-in CLI called virsh. You can use virsh to perform all KVM functions such as:
- virsh list --all (to see all VMs)
- virsh start [vmname] (to start a VM)
- virsh shutdown [vmname] (to shutdown a VM)
- virsh dumpxml [vmname] (to save a VM config to use later)
- virt-clone --original xubuntu --name xubuntu2 --auto-clone
- virsh list --all
- virsh start xubuntu2
Thank You
Thank you for taking the time to read this post. I hope you found it informative. I look forward to your feedback and improvements.