How to Expand an Asustor Flashstor RAID0 Volume

Why?
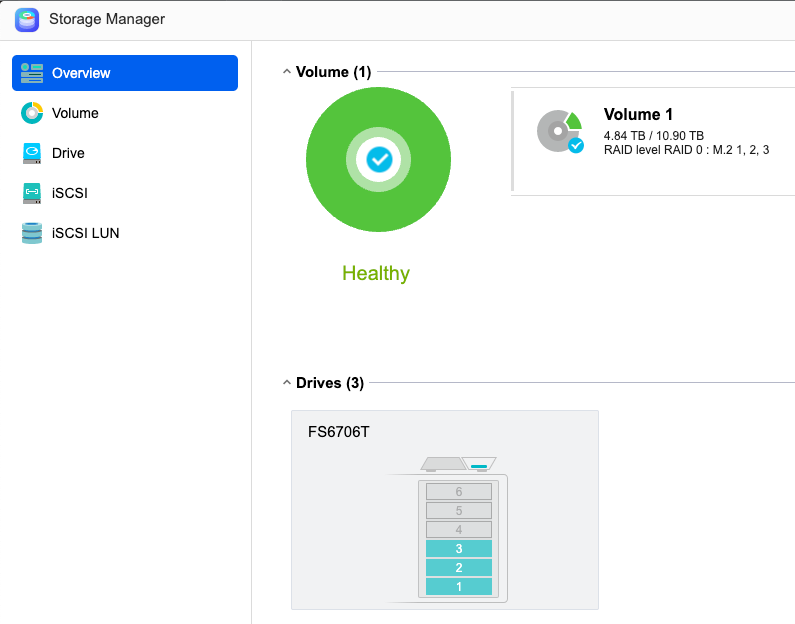
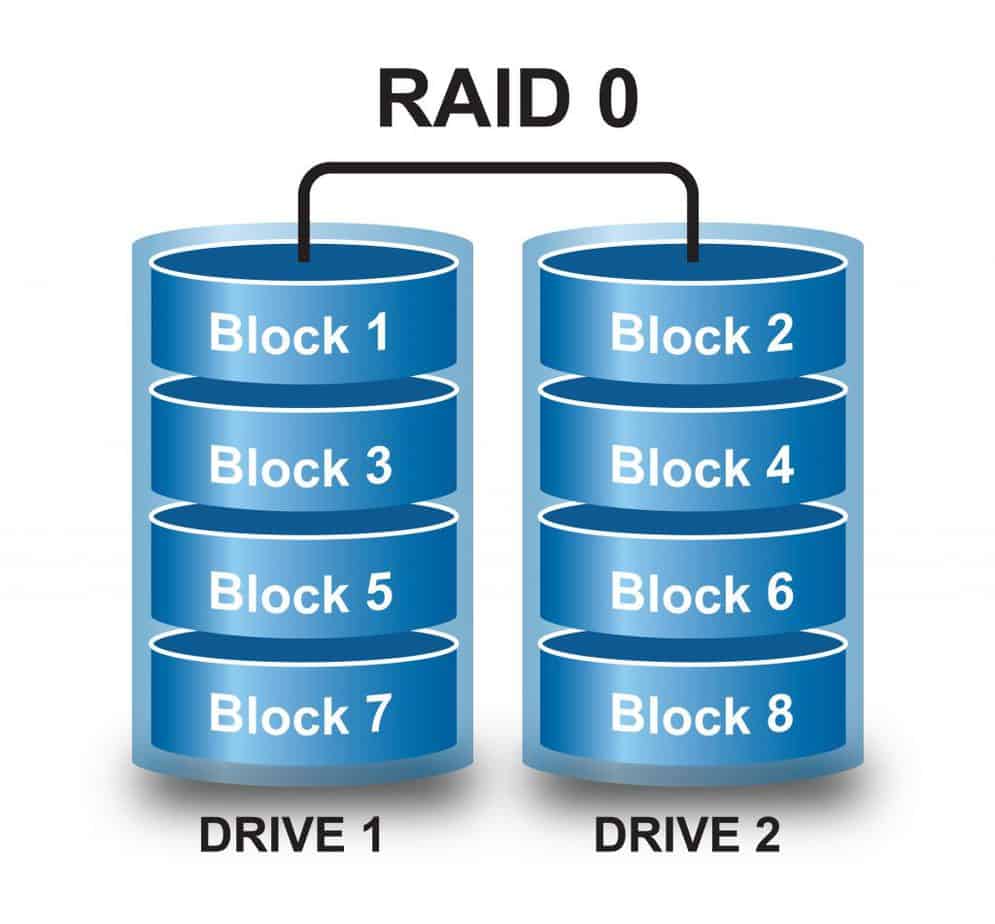
Well, I bought a new Asustor Flashstor FS6706T and two 4TB NVMe drives. Since I wanted to get the most usable space, and I run a full backup every night, I configured them as RAID0. When my roughly 7+ TB of usable space started to fill up, I bought another 4TB NVMe drive to add to the volume. That was when I found out that Asustor only supports expanding RAID 5, 6, and 10 volumes. Oops.
(Side note: Asustor support was very helpful and responsive when I reached out to them for support)
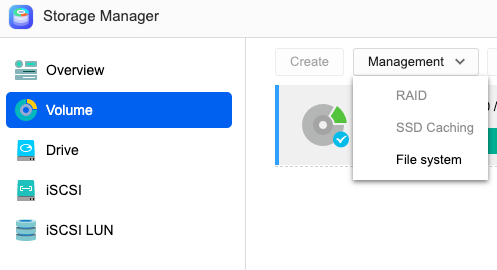
It looked like if I was going to expand this RAID0 volume, I would have to expand in an unsupported manner from the CLI. Here is how I did that.
What?
This post may only affect a few people out there, but I hope it saves someone some time and even some storage expense. If you own this storage configuration, this post is for you:
- Asustor Flashstor
- Some number of NVMe drives configured as RAID0 in the Asustor GUI
How?

This took some Linux sleuth work to understand how Asustor creates volumes under the covers.
I started by ssh-ing to the Asustor
$ ssh admin@asustor -p 33
admin@Asustor:/volume1/home/admin $
Then it was time to figure out what was under /volume1
admin@Asustor:/volume1/home/admin $ df -h
Filesystem      Size  Used Avail Use% Mounted on
rootfs          1.8G   69M  1.8G   4% /
tmpfs           1.9G     0  1.9G   0% /tmp
/dev/md0        2.0G  409M  1.5G  22% /volume0
/dev/loop0      944K   10K  914K   2% /share
/dev/md1         11T  6.2T  4.8T  57% /volume1
/dev/md1         11T  6.2T  4.8T  57% /volume1/.@iscsi
/dev/md1         11T  6.2T  4.8T  57% /volume1/.@plugins
It looks like /volume1 is backed by /dev/md1. /dev/md* on Linux refers to software RAID. I don't have much experience with Linux software RAID other than LVM mirroring, so I did some research. mdadm is the Linux command for managing software RAID. The mdadm command to inspect an existing software RAID is
$ sudo mdadm --misc --detail /dev/md1
/dev/md1:
           Version : 1.2
     Creation Time : Tue Dec 17 16:15:26 2024
        Raid Level : raid0
        Array Size : 7804858368 (7.27 TiB 7.99 TB)
      Raid Devices : 2
     Total Devices : 2
       Persistence : Superblock is persistent

       Update Time : Tue Dec 17 16:15:26 2024
             State : clean
    Active Devices : 2
   Working Devices : 2
    Failed Devices : 0
     Spare Devices : 0

            Layout : -unknown-
        Chunk Size : 64K

Consistency Policy : none

              Name : FS6706T-AB21:1
              UUID : 15ac532f:b9d696e3:a64c8101:d969e366
            Events : 0

    Number   Major   Minor   RaidDevice State
       0     259        9        0      active sync   /dev/nvme1n1p4
       1     259       10        1      active sync   /dev/nvme0n1p4
I see my two original NVMe drives and that partition4 of each drive is being used in this RAID0 volume.
I had already installed the third 4TB NVMe drive, but needed to partition the drive to match its two siblings. I cheated the partition step by using the Asustor GUI to create a second RAID0 using only the third NVMe drive. This formatted the drive the way Asustor wanted it. I then removed the new volume (/volume2) from the GUI. This left me with my third drive formatted like its siblings:
$ sudo fdisk -l  /dev/nvme2n1
Disk /dev/nvme2n1: 2048 GB, 2199023255040 bytes, 4294967295 sectors
2097151 cylinders, 64 heads, 32 sectors/track
Units: sectors of 1 * 512 = 512 bytes

Device       Boot StartCHS    EndCHS        StartLBA     EndLBA    Sectors  Size Id Type
/dev/nvme2n1p1    1,0,1       255,63,32         2048     524287     522240  255M 83 Linux
/dev/nvme2n1p4    0,0,2       0,63,32              1       2047       2047 1023K ee EFI GPT

Partition table entries are not in disk order
The mdadm command to expand an existing RAID0 array is
$ sudo mdadm --grow /dev/md1 --level=0 --raid-devices=3 --add /dev/[new_device]
So for me, the command to expand my RAID0 volume from 2 to 3 drives was:
$ sudo mdadm --grow /dev/md1 --level=0 --raid-devices=3 --add /dev/nvme2n1p4
     "raid 0 become raid 4 and after reshape will be raid 0 again"
Note the message "raid 0 become raid 4 and after reshape will be raid 0 again". The array remains online, but is busy for hours leveling disk blocks across the new drive. You can watch the leveling and see how much time is left with this command:
$ cat /proc/mdstat
Personalities : [linear] [raid0] [raid1] [raid10] [raid6] [raid5] [raid4]
md1 : active raid4 nvme2n1p4[3] nvme1n1p4[0] nvme0n1p4[1]
7804858368 blocks super 1.2 level 4, 64k chunk, algorithm 5 [4/3] [UU__]
[>....................]  reshape =  0.5% (21469056/3902429184) **finish=455.0min** speed=1,421,54K/sec
It took about 10 hours to level my 2 drive NVMe array to a 3 drive NVMe array. This only expands the underlying /dev/md1. The btrfs file system on top of /dev/md1 also has to be expanded. The command to expand a btrfs file system is:
$ sudo btrfs filesystem resize max /volume1
Resize device id 1 (/dev/md1) from 7.27TiB to max

$ sudo btrfs filesystem show
Label: none  uuid: 7acbcca8-5d02-4ee7-9808-64783df9992c
Total devices 1 FS bytes used 6.04TiB
devid    1 size 10.90TiB used 6.85TiB path /dev/md1
Amazingly, I did not crash my array or lose access to /volume1 during this entire operation. There is still one very important step - ensure that this new 3-drive array persists across reboots. In regular Linux, one has to edit /etc/mdadm/mdadm.conf so that array changes persist across reboots. The same file on Asustor is /volume0/usr/etc/volume.conf. The format is also different from the standard mdamd.conf file. I needed to update Raid = from 2 to 3, Total = from 2 to 3 and Index = from 160,161 to 160,161,162 (I found a post online that explained this)
admin@Asustor:~ $ cat /volume0/usr/etc/volume.conf
[volume1]
Level = 0
Raid = 3
Total = 3
Option = 0
Ftype = btrfs
UUID = 15ac532f:b9d696e3:a64c8101:d969e366
Index = 160,161,162
Cachemode = 0
CLevel = 0
CState = -1
CDirty = 0
CUUID =
Cnumber = 0
CIndex =
Cseqcut = No
CsizeMB = 0
Once I edited and saved this file, I crossed my fingers and rebooted the Asustor. Not only did the new 3-drive array come up and mount, the GUI was happy displaying the new array. Phew!
Thank You
Thank you for taking the time to read this post. I hope you found the post educational and, hopefully, time-saving. I welcome your feedback.